Bringing pieces of the beach into your home can be as simple as collecting seashells and turning them into DIY crafts. Whether you have a growing collection from past vacations or just a few beautiful shells, there are plenty of practical and creative projects you can try. Seashell DIY crafts offer a budget-friendly and personal way to decorate your space or create memorable gifts.
With just a few basic materials and some inspiration, you’ll find it easy to make coasters, pendants, decorative frames, and more. From simple beginner projects to more advanced designs, working with seashells lets you add a natural, coastal touch all year round.
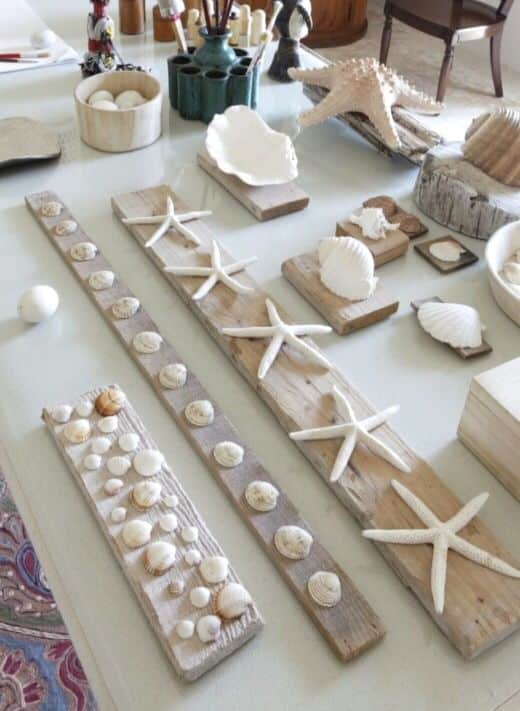
Key Takeaways
- Learn the key tools and materials for DIY seashell crafts.
- Prepare and use seashells for creative home decor projects.
- Find inspiration and tips for both beginner and advanced craft ideas.
Essential Materials and Tools for Seashell DIY Crafts
To get started with seashell DIY crafts, you need a few simple basics like shells, the right glue, and decorative items. Choosing quality materials helps you make sturdy and attractive pieces that last.
Types of Seashells for Crafting
You can use a wide range of seashell types, from tiny clam shells to larger conch and scallop shells. Assorted seashells work well for most projects because they add variety in color, shape, and texture.
Many crafters favor flat shells for mosaics, frames, or wall hangings, as they’re easy to attach. Starfish, sand dollars, and small snail shells are popular for focal points or accents. Always clean and rinse shells thoroughly before use to remove sand and debris.
If you want unique pieces, try using shells with holes or interesting patterns. Avoid fragile or cracked shells, as they may break during your project.
Adhesives and Glues: Hot Glue, Tacky Glue, and White Glue
Choosing the right adhesive makes a big difference in your crafting experience. Hot glue guns provide a strong and quick bond for attaching shells to wood, glass, or canvas. They’re especially useful for heavier shells or quick assembly.
Tacky glue is a thick, strong adhesive well suited for children’s crafts or more delicate placements where you need a slower setting time. It’s less likely to burn than hot glue and dries clear.
White glue (like standard school glue) is best for lightweight shells and paper crafts. Use white glue for projects where precise application is important. For outdoor crafts, pick a waterproof adhesive for extra durability.
| Glue Type | Best For | Pros | Cons |
|---|---|---|---|
| Hot Glue | Heavy, quick projects | Fast, strong | Can burn, stringy residue |
| Tacky Glue | Lightweight, detailed | Thick, dries clear | Slow drying |
| White Glue | Paper, delicate crafts | Easy, accessible | Weaker hold, slow drying |
Paints and Decorative Materials
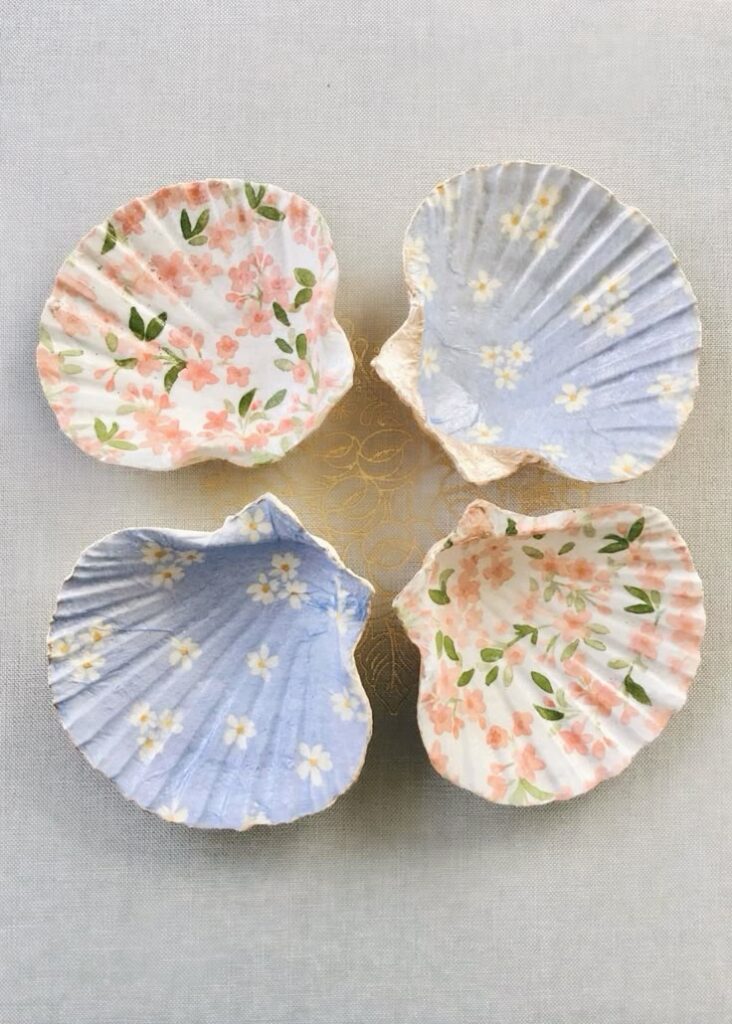
Acrylic paint is great for decorating seashells. It covers well, dries quickly, and comes in many colors. You can use fine brushes for detailed patterns or sponges for a textured look.
You can add sparkle with glitter, metallic foil, or small beads. Seal your shells with a clear, waterproof varnish or sealer to protect the paint and give them a lasting shine.
Other decorative materials include ribbons, yarn, and small faux pearls. For extra visual interest, try sticking on small stickers or using markers for easy designs.
Where to Find Craft Supplies
You can gather seashells from local beaches, but always check local rules about shell collecting. Some beaches restrict removing shells to protect natural habitats.
Most craft stores stock assorted seashells, glues, paints, and decorative accents. Dollar stores often have budget-friendly kits and supplies for seashell crafts.
For unique or bulk shells, look online at major retailers or specialty art supply shops. Ask friends or family to save shells from beach trips to build your collection without spending extra.


Preparing Seashells for DIY Projects
Before starting your next craft, take a few simple steps to get your seashells ready. Cleaning and sorting help prevent odors, mold, and accidental damage, resulting in longer-lasting and more attractive pieces.
Cleaning and Sanitizing Your Seashells
First, rinse your seashells under cool running water to remove loose sand, dirt, or debris. For stuck-on residue, soak them in a mixture of water and a small amount of bleach (about one capful per bucket of water) for several hours. This helps whiten the shells and removes any lingering smell.
After soaking, use an old toothbrush to gently scrub away remaining particles. Be careful, as delicate shells can break if handled too roughly. Rinse the shells thoroughly with fresh water to remove any bleach residue.
Lay the shells out to air dry completely on a towel. Make sure the shells are dry before storing or using them in projects, as moisture can lead to mold.
Sorting and Organizing Your Shell Collection
Sort your assorted seashells by size, color, and shape. This makes it easier to find the right shell for each project and ensures a consistent look in your finished craft.
Create separate containers or trays for different types, such as scallops, mussels, and spiral shells. For especially small shells, use sectioned craft boxes. Labeling containers can also help you quickly spot specific shells when you need them.
Arrange your shell collection in a way that lets you quickly glance and choose what you need. This keeps the creative process smooth and prevents accidental breakage from repeated handling.


Easy Seashell Craft Ideas for Beginners
You can make attractive seashell crafts with minimal supplies and basic skills. Common materials include glue, string, magnets, and old photo frames found around your home.
Simple Seashell Ornaments
Making seashell ornaments is straightforward. Begin by selecting a few shells of medium size that have a flat surface. Clean and dry them, then use a small drill to create a hole near the top of each shell.
Thread a ribbon or natural twine through the hole and tie a knot at the end. For extra flair, you can add small wooden beads or paint the shells with acrylic paint. These ornaments work well for decorating a holiday tree, hanging along windows, or adding to gift packages.
Materials Needed:
- Seashells
- Ribbon or twine
- Drill or strong glue
- Optional: paint, beads
Tip: If you don’t want to drill, use strong adhesive to attach the string to the back of the shell.
Crafting a Beach-Themed Picture Frame
A beach-themed picture frame brings memories of the coast to your favorite photos. Start with a plain wooden or cardboard frame. Arrange cleaned shells around the frame to choose a pleasing layout.
Attach the shells one by one using hot glue, pressing each shell firmly until the glue cools. Mix in other coastal elements such as tiny pebbles or a sprinkle of craft sand for more texture. You can also incorporate starfish, sea glass, or small pieces of driftwood for variety.
Let the frame dry fully before inserting your photo and displaying it. This simple project makes a thoughtful gift or a unique piece of home decor.
Handmade Seashell Magnets
Seashell magnets are practical and decorative. Pick shells that are small and fairly flat, as these attach best to magnets.
Use strong craft glue to secure a round magnet to the back of each shell. Press the shell onto the magnet and let it set for a few minutes. If you like, add decorations with paint, colored markers, or tiny rhinestones before the glue dries.
Here’s a quick reference table:
| Material | Purpose |
|---|---|
| Seashells | Main decor |
| Magnets | Attaches to fridge or board |
| Craft glue | Secures magnet |
| Paint/Markers | Custom design |
Place these seashell magnets on your fridge or any magnetic surface for a subtle, beach-inspired touch.


Creative Seashell Projects for Home Decor
Seashells can bring a natural coastal touch into your living space. Using them in home decor projects lets you highlight favorite finds in creative and practical ways.
Designing Seashell Art for Walls
Seashell art for your walls can take many forms, from simple framed arrangements to elaborate mosaics. Gather shells in different sizes and shapes, then arrange them on canvas or within a shadowbox for a personalized display. Try creating patterns, outlines of sea creatures, or geometric designs for added interest.
To secure the shells, hot glue works well for most types. Enhance the overall effect with painted backgrounds, fabric, or other natural elements like driftwood. For a gallery-inspired look, display several smaller pieces together. Wall-mounted seashell decor stands out in entryways, bathrooms, or bedrooms, instantly evoking a calm, beachy atmosphere.
Making Seashell Candle Holders
Seashell candle holders are a simple yet effective way to add coastal style to your table or shelves. Start with clear glass votives or jars and use strong adhesive to attach small shells around the rim or in patterns along the sides. Mix shell types for texture, or keep it uniform for a sleeker look.
For a centerpiece, place a large scallop or clam shell on a tray and position a tealight or pillar candle inside. If you like, fill empty spaces with beach sand, tiny pebbles, or smaller shells for added detail. Always ensure that shells do not come into direct contact with the flame to maintain fire safety. Group several candle holders for a glowing, seaside-inspired display.
Crafting Decorative Bowls and Vases
With a few materials, you can transform plain containers into eye-catching seashell decor. Select a glass bowl or ceramic vase in a simple shape. Use craft glue to attach shells along the rim, in bands, or covering the entire surface, depending on your style.
For a statement bowl, choose larger shells and arrange them to overlap slightly around the edge. You can also fill the bowl with shells, colored sand, or beach glass for a layered look. Vases decorated with seashells make beautiful flower holders or stand-alone accents in living rooms and bathrooms. This approach blends natural textures with everyday function, creating pieces that are both useful and visually appealing.
Advanced Beach-Inspired Seashell Crafts
Seashells from your vacation can be more than keepsakes—they can take center stage in unique creations. With the right techniques and a few materials, you can make accessories or striking decorative pieces that bring the beach into your everyday life.
DIY Seashell Jewelry and Accessories
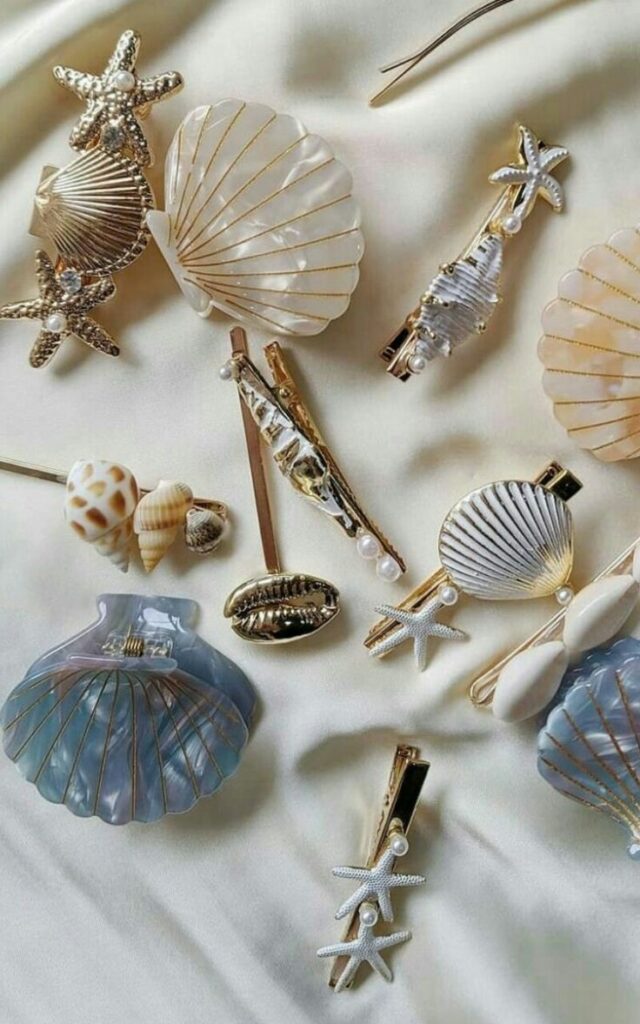
Transforming shells into jewelry is a practical and creative way to carry a piece of the ocean with you. You’ll need small or medium-sized shells, jewelry findings, a small hand drill, and strong adhesive. For necklaces or earrings, drill a tiny hole at the top of the shell and thread a jump ring through, then attach it to a chain or earring hook.
You can make bracelets, anklets, or hair accessories by using smaller shells and combining them with beads or woven cords. Resin can also be poured over shells to create smooth, glass-like pendants or coasters. Simple supplies such as hot glue, satin ribbon, and metallic wire can give your accessories a personal and stylish touch.
Try pairing shells with sea glass, pearls, or colorful threads to match different outfits or seasonal colors. Many crafters also enjoy painting their shells with enamel or acrylic paint for bolder looks.
Sculptural and Mixed Media Seashell Creations
Beyond jewelry, shells can be used to build sculptural and mixed media pieces for home decoration. Create shadow boxes, picture frames, or even larger wall art by affixing shells onto backgrounds such as driftwood, canvas, or glass. Arrange the shells in patterns—such as mandalas or ocean scenes—to highlight their shapes and textures.
For tabletop sculptures or figurines, use a strong craft glue or epoxy to bond shells together in layers or clusters. Combine shells with stones, sand, or small wooden figures for mixed media art. Some crafters incorporate tiny LED lights into their arrangements for a subtle glow reminiscent of a beach sunset.
Experiment with using resin to encapsulate shells for lasting, glossy finishes. Display your creations around your home or use them as personalized vacation gifts for friends and family who appreciate beach-themed decor.
Tips, Inspiration, and Crafting Tutorials
Collecting seashells during a vacation can bring more than just memories; it provides creative material for unique crafts. With the right resources and tutorials, you can turn your finds into personal, stylish décor or gifts.
Finding Ideas from Beach Vacations
When you travel to the beach, make it a point to search for different shapes and colors of seashells. Look for shells with interesting textures, as these can add detail and variety to your projects.
Keep a small container or mesh bag in your beach bag to safely collect and transport your shells home. Clean your seashells in warm, soapy water and let them dry thoroughly before using them in crafts. This removes salt and sand, ensuring a better finish.
Use your vacation finds to create keepsakes such as picture frames, coasters, wind chimes, or mirrors. For inspiration, keep a small travel journal to sketch ideas or jot down projects you want to try once you’re back.
Arrange your seashells by size and color before starting a project. This helps you visualize different design patterns and combinations for your crafts.
Best Resources for Seashell Craft Tutorials
Several reliable resources provide clear instructions for seashell crafts, making these projects accessible to all skill levels. YouTube channels like Sea Shell Crafts / Stunning, Easy DIY Ideas offer step-by-step videos for beginners and experienced crafters.
Craft blogs such as Mod Podge Rocks share lists of over 30 seashell craft ideas, from simple kid-friendly projects to elegant home décor. They often include material lists, photos, and troubleshooting tips.
Social platforms like Pinterest and DIY websites provide visual boards, guides, and video tutorials. These sources focus on creative uses for shells, like resin coasters, decorative jars, and wall hangings.
You can also find craft kits or printable templates on sites like Baker Ross, which help guide you through structured projects for a successful result. For detailed tutorials, search for specific project names to get focused, easy-to-follow instructions.


